Spinning up an Azure OpenVPN Server for MTG: Arena
A guide to getting an OpenVPN server up and running in Azure East US 2. Ostensibly to mitigate MTG: Arena network issues


This guide is geared towards getting an OpenVPN server up and running in Azure East US 2 for better MTG: Arena stability but also serves as a general guide.
Though in reality the Azure Quickstart template does most of the heavy lifting.
Update 07/10/20: As I was writing this guide I lost the ability to open up MTG: Arena while connected to the VPN. I had to disconnect, run Arena and then connect after I was already loaded in. There is a chance they may have fixed the network stability issues and in doing so made it harder to connect while behind a VPN.
Introduction
Note: this has only been tested on Windows 10. It should also work on macOS but hasn’t been tested.
As I mentioned in my previous post I managed to mitigate a lot of the network instability I was having with MTG: Arena by spinning up a VPN server in Azure East US 2 and playing from behind that.

Before I dive too deep let’s go over some prerequisites.
- An Azure account. Good news, they offer a trial period with $200 credit for 30 days and 12 months free on certain products. If you don’t have an Azure account head here. If you have an account (and a Subscription) then read on.
- Administrator rights on whatever computer you’re using since you’ll be installing some software.
- A good text editor. I recommend Notepad++ on Windows or Atom on either macOS or Windows.
- Your home IP. Grab this from your favorite website (I’m partial to IP Chicken).
Spinning Up The Server
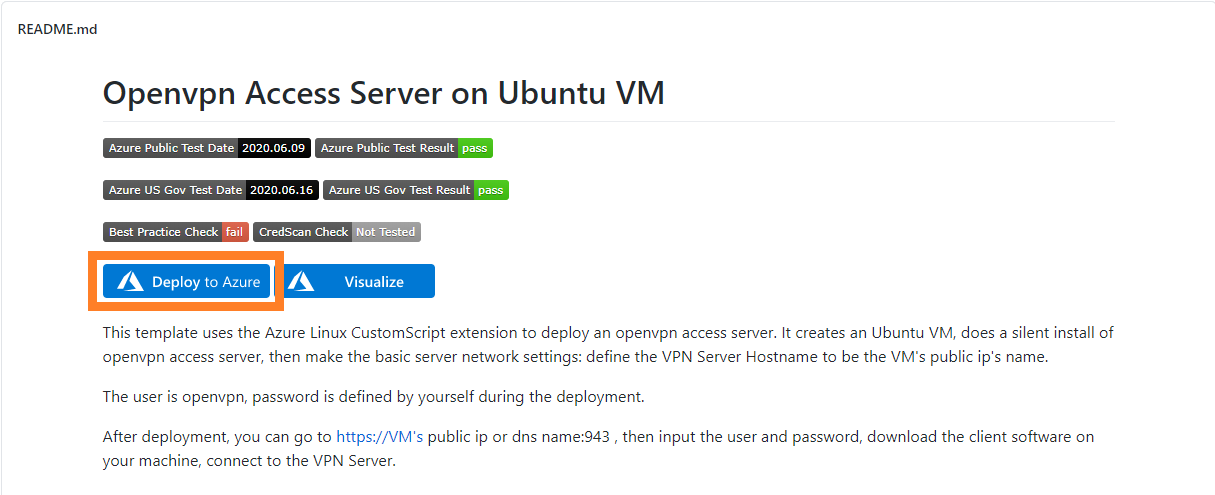
After you’ve created your Azure account (or logged into your Azure account) you’ll want to head to the Openvpn Access Server on Ubuntu VM Quickstart page on Github.
 Azure
AzureNext click on the Deploy to Azure. If you’re not already signed in you’ll need to sign into Azure.
A few seconds later you’ll be presented with something that looks like this. Time to break down each section.
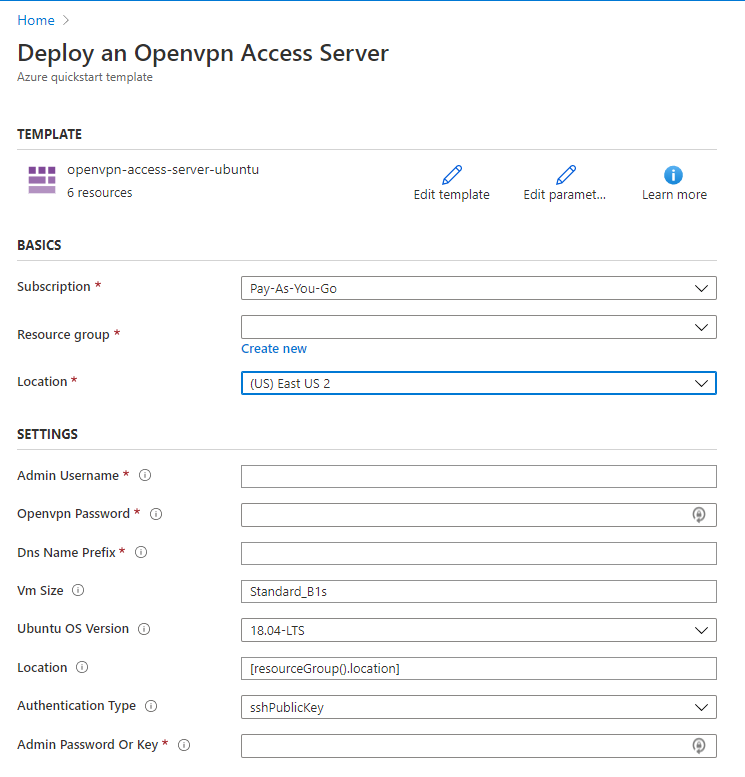
Subscription: This should already be filled in with your existing subscription.
Resource Group: Choose Create New and give it a unique name like vpn-for-mtg-arena.
Location: This should be (US) East US 2 for best results.
Admin Username: Choose something you’ll remember but not easily guessable. You’ll need this if you ever log into the server via SSH.
Openvpn Password: This is what you’ll be using to connect to the server. Choose a strong password, preferably one randomly generated by a password manager like LastPass or 1Password.
DNS Name Prefix: Again choose something memorable to name your server. This needs to be a unique lower-case value. Someone may have already registered the name you choose so you may need to try a few different ones before you get one that works.
VM Size: Leave this at the default Standard_B1s. It works perfectly fine for our needs, is covered under the 12 month free tier and is very cheap in general.
Ubuntu OS Version: Unless you have a flavor of Ubuntu you really like then leave the default.
Location: Leave the default.
Authentication Type: If you have no idea what an SSH Public Key is then change this to password. Otherwise leave it at default.
Admin Password or Key: If you chose password in the previous field then choose a strong password that is different than the password you chose for the Openvpn Password. Again I would recommend a password manager here. If you are using a public key input your public key here. This can be found by default (if generated) in C:\Users\$user\.ssh\id_rsa.pub on Windows or ~/.ssh/id_rsa.pub on macOS.
If you need to generate an SSH key then I would recommend taking a look at the guide for OpenSSH (macOS and Windows Subsytem for Linux) or PuTTY. Again using a password is perfectly fine too.
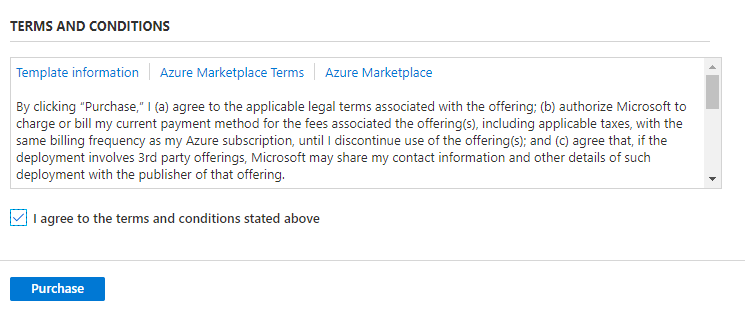
Finally scroll down, agree to the Terms and Conditions and choose Purchase.
Azure will go off and provision your resources for you. This will take a few minutes so let’s talk about cost. If you’re on a Free account you can just keep scrolling as almost everything that’s being spun up will be covered.
If you aren’t on a Free account here’s what you need to know: this will cost you a little bit of money. However it’s not a lot of money. Per Azureprice.net a B1s VM will run you about 25 cents (USD) a day. Plus a little bit on top for the virtual network and bandwidth.
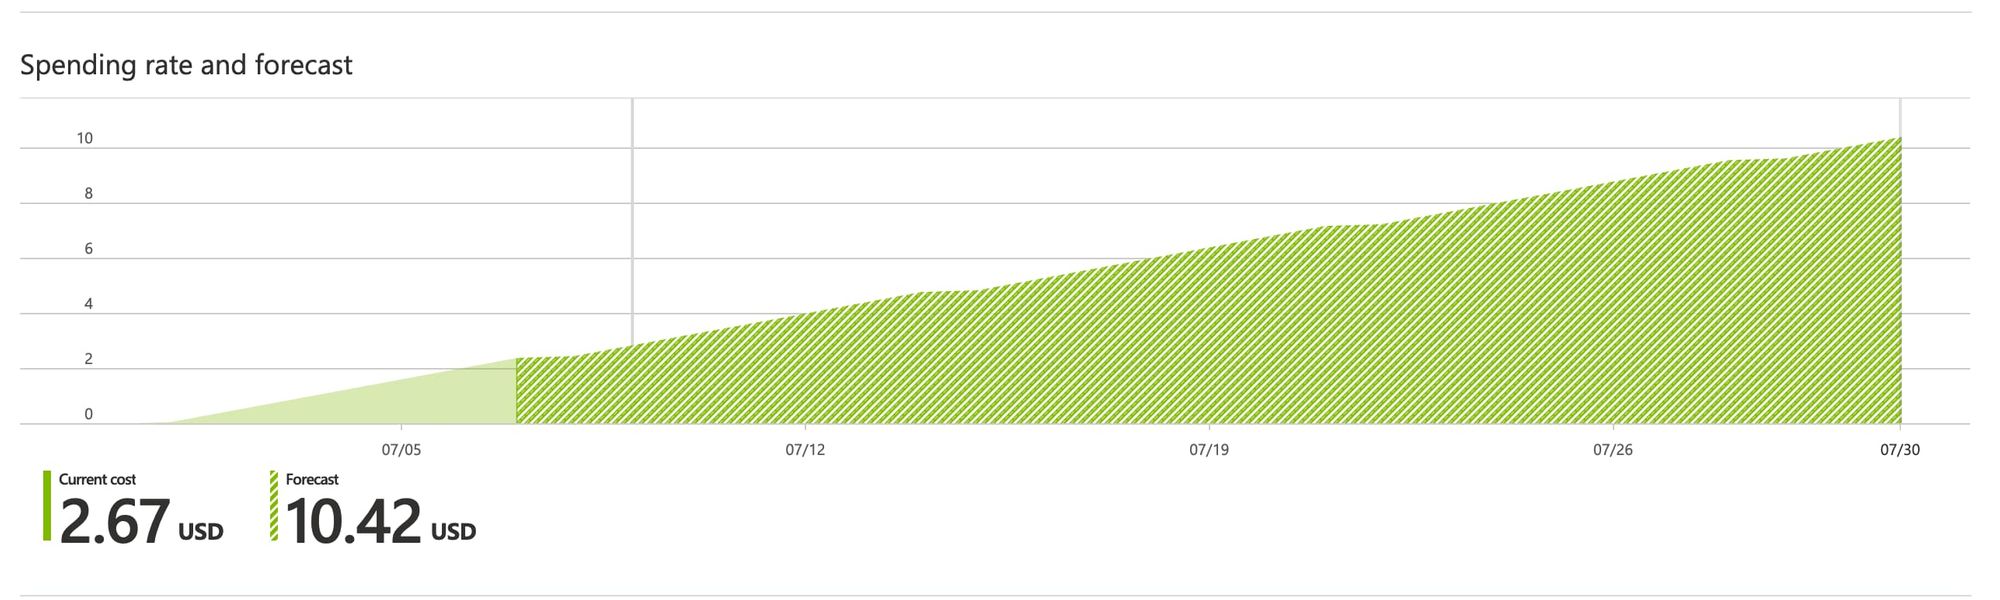
With that being said I’ve had my server up for about a week and the current charge on my account is $2.67 USD with Azure forecasting it to $10.42 USD by the end of the month. Though that number could always change.
I am by no means an expert on Azure billing but in general it should be relatively cheap to run one of these. The best way to save money is likely to shut it down while not using it.
By now all the resources should have been created. If anything failed Azure will tell you so you can make any fixes and run through the process again. Onto the next step: locking access down.
Locking Down Access
By default the template opens up your server to the world. If you chose strong passwords and/or used an SSH Public Key this really isn’t a huge issue but it’s good practice to lock access down to your home IP and/or other known IPs.
Note: if you know your home IP changes a bunch (and you chose strong passwords) you can skip this section.
First go to the Resource Groups section of the Azure portal and choose the one you just created. On the next screen you’ll want to click on OpenVPN-NSG.
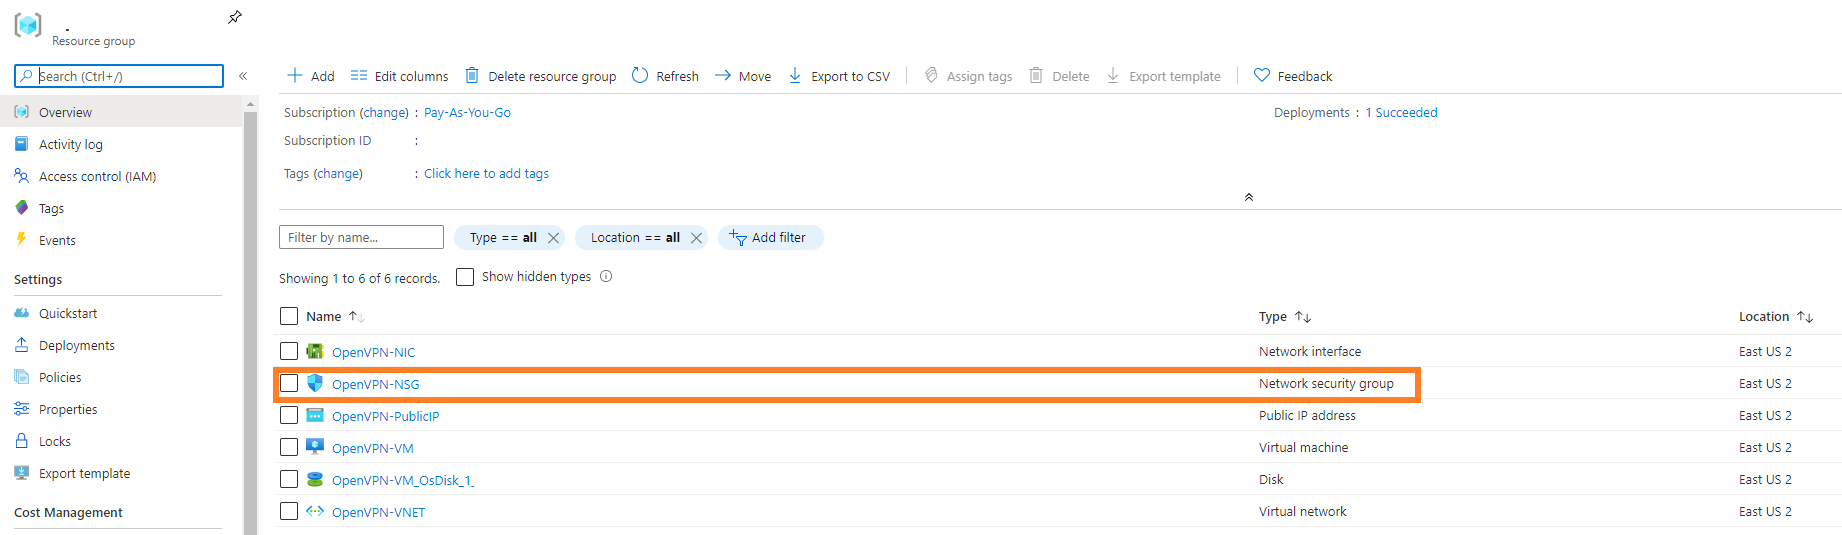
This will bring you to the page for editing the Network Security group. Yours will look slightly different than mine (Source will be Any instead of blank) but the concept will be the same. The ones that we’re going to edit are the first four, highlighted below.
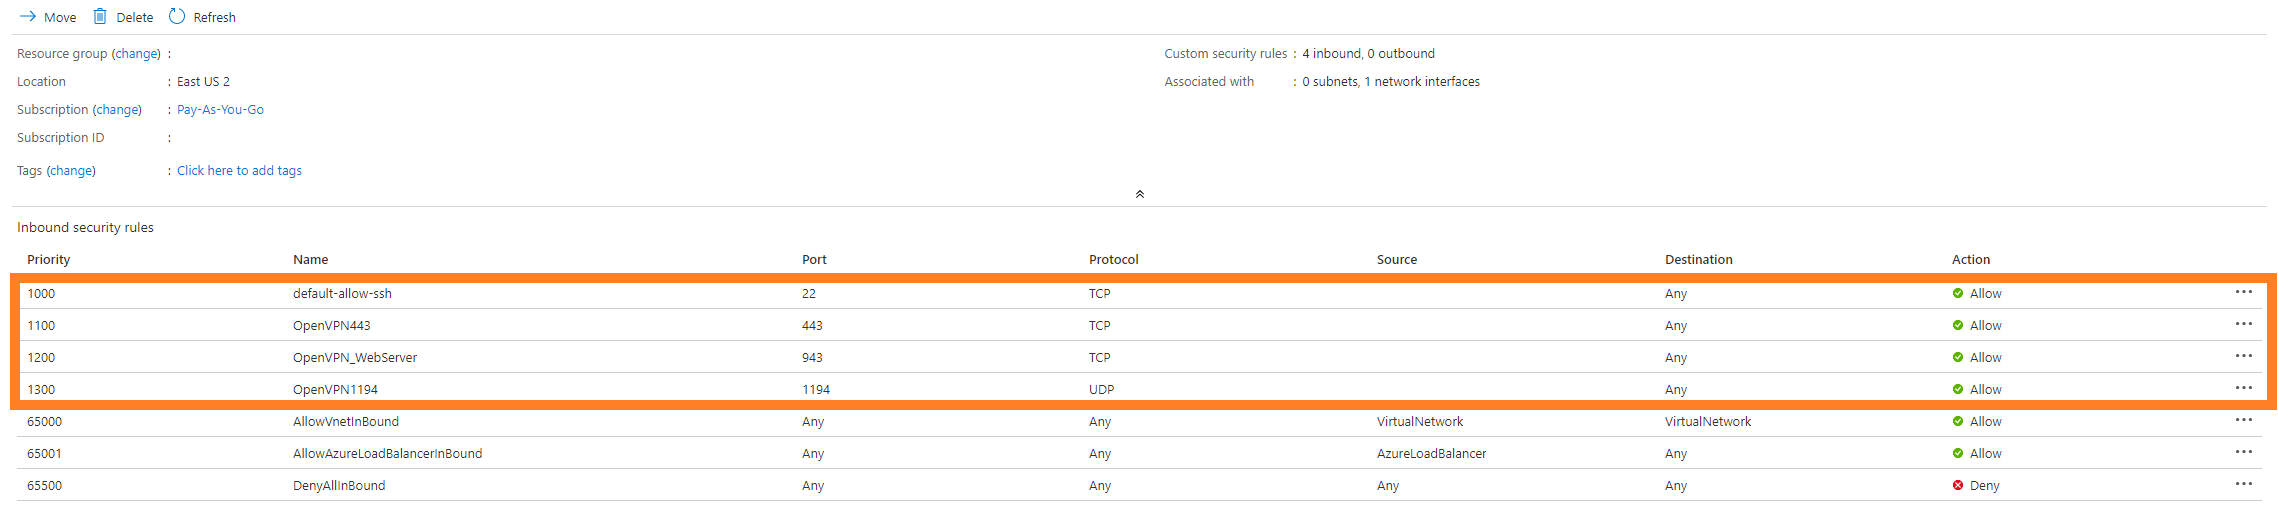
First we’re going to start with default-allow-ssh and work our way down. You can edit the rule by clicking on it. A pane will pop up on the right hand side of your screen. I’ll walk through each section you need to change
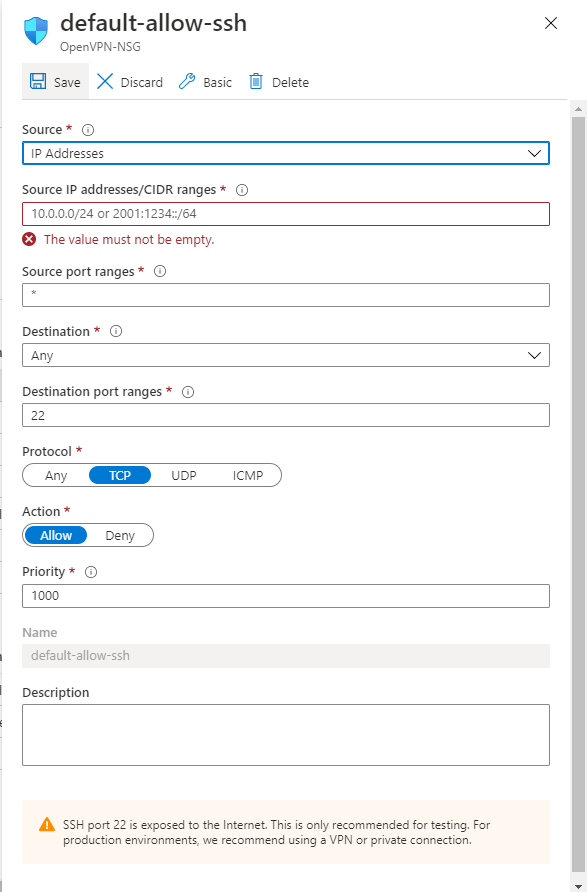
Source: Change this from Any to IP Addresses.
Source IP addresses/CIDR ranges: Take the value you got earlier from a website like IP Chicken and put it here. If you have multiple IP addresses you want to allow separate them with commas.
Source port ranges: No changes.
Destination: No changes.
Destination port ranges: No changes.
Protocol: No changes
Action: No changes.
Priority: No changes
Finally add a description if you’d like and choose Save at the top. Repeat this process for OpenVPN443, OpenVPN_WebServer, and OpenVPN1194. When you’ve finished the Source column should now have your IP address in it!
Accessing Your Server
After you’ve locked everything down to your home IP (or a range of them) it’s time to access the OpenVPN web interface so you can download the OpenVPN software and configuration files.
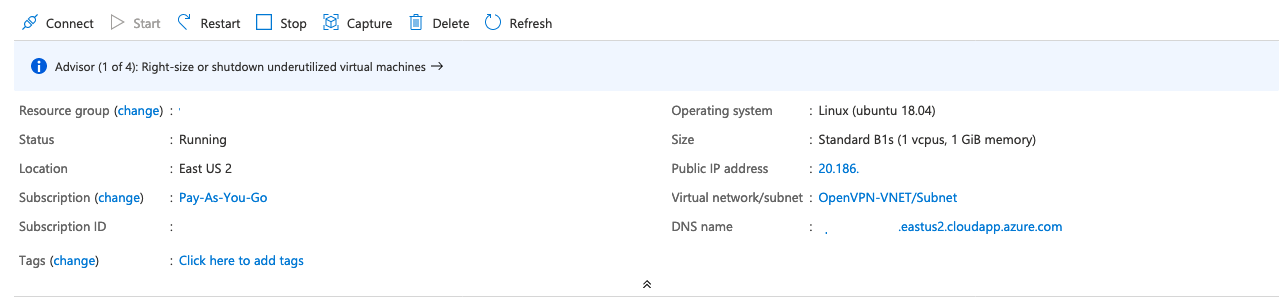
From the page for your Resource Group you accessed earlier you’ll want to click on OpenVPN-VM which will bring you to the overview page for the VM you created.
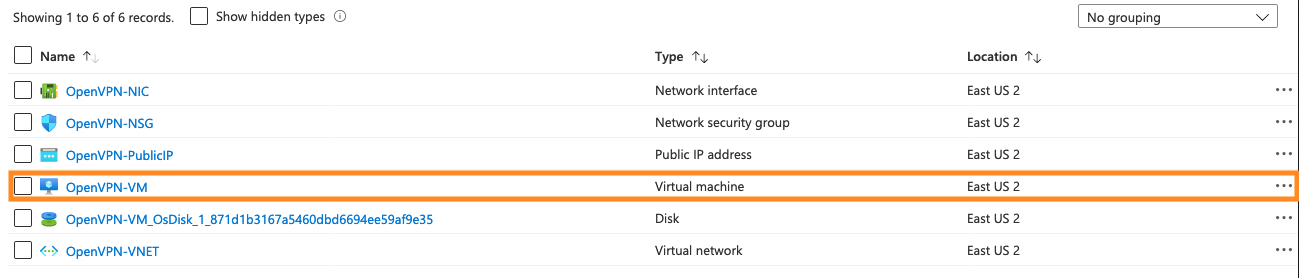
From here you want to make note of two fields: Public IP Address and DNS Name. Open up your favorite text editor and copy these down as we’ll need them soon.
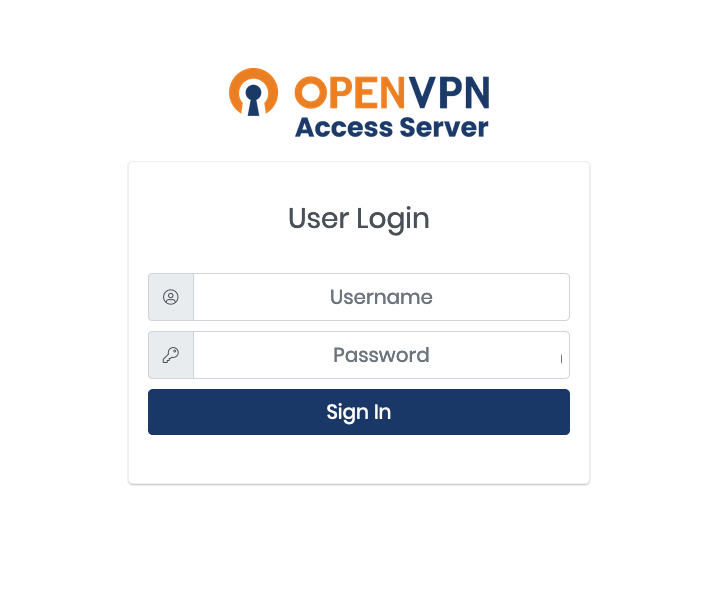
Next open up a web browser and type https://your-dns-name which will bring you to the OpenVPN login page for your server. Here type in the username openvpn with the Openvpn Password you set earlier.
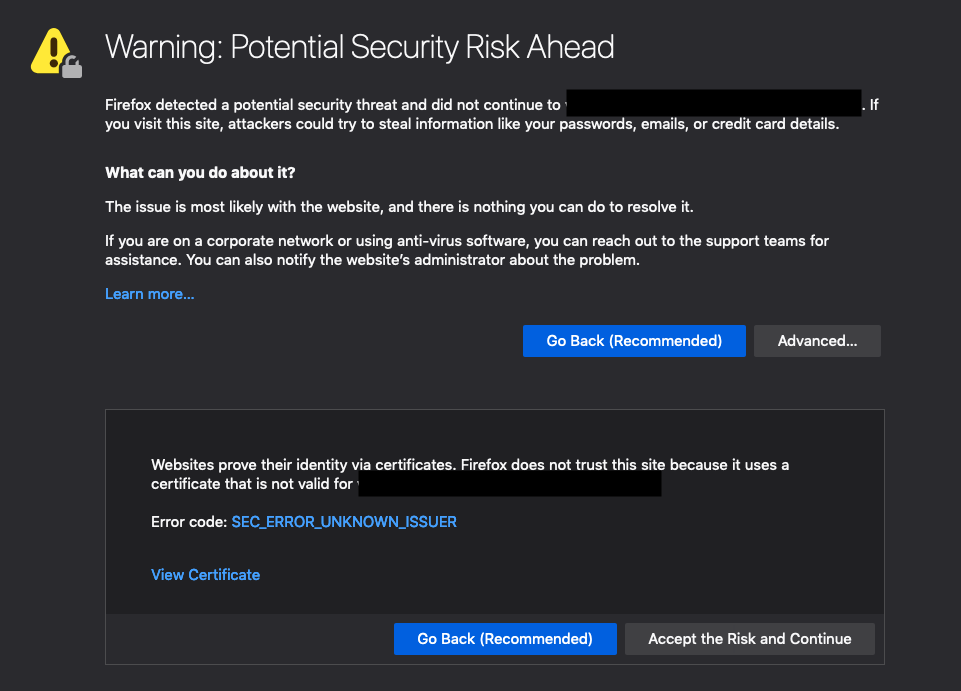
If you get a certificate warning you can ignore it and continue to the page using the option presented in your browser. An example in Firefox is below.
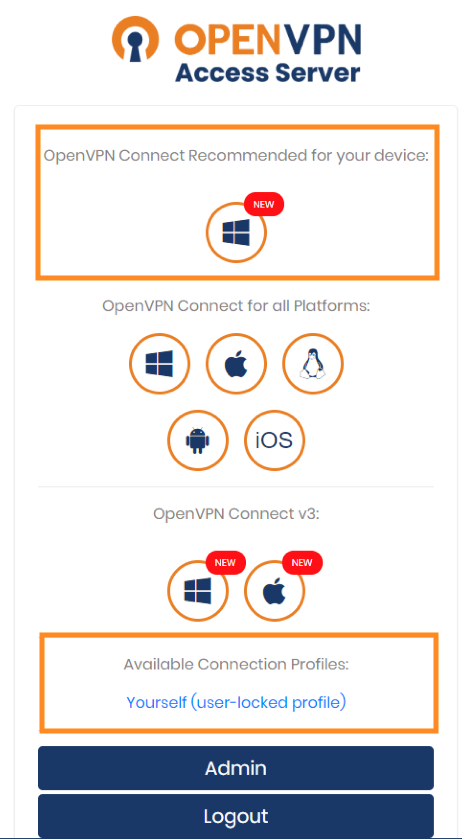
Once you’ve logged in you’ll be presented with a variety of options that looks similar to the ones below. You’ll be downloading two items from here: the executable under OpenVPN Connect Recommended for your device and the user profile named Yourself (user-locked profile).
Once you’ve downloaded the installer find the file on your computer and run it. This installation process is pretty quick but you do need to be an Administrator on your computer to run it.
Once you’ve finished the installation you’ll want to find and open the program OpenVPN Connect. Feel free to skip the tour and agree to anything that pops up. After you’ve gone through all of that you’ll be presented with the Profiles page. There might already be one there but we’re going to delete it and replace it.
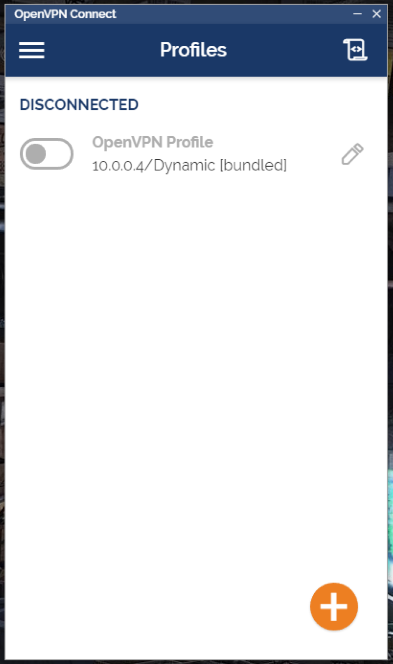
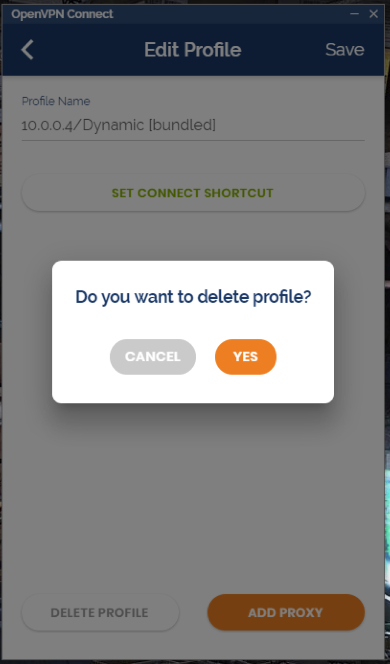
Press the button that looks like a pencil next to the profile and then choose Delete Profile on the next screen and confirm the deletion.
Before we move on to importing a new profile we'll first need to edit the profile file you downloaded earlier. Make sure you have the IP address of your VM handy as you'll need it for this step.
Open up the profile file you downloaded (likely named client) in your text editor of choice. For this I'm going to recommend Notepad++ as I know it works. Other text editors might but I haven't tested them. When you open the file it'll look similar to this though without the giant blank section.
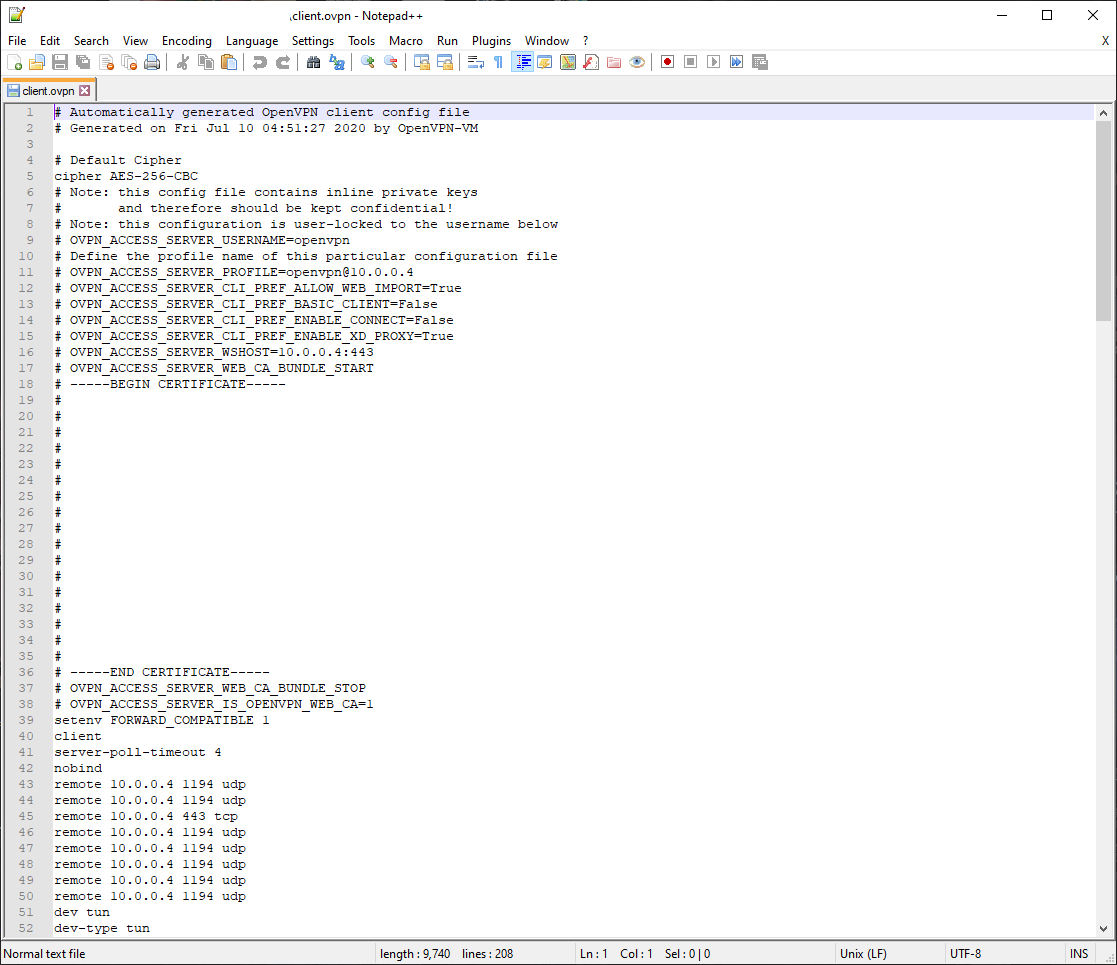
You can ignore most everything in this file but make note of the IP address that comes after openvpn@ and note it down. It may be 10.0.0.4 like in my file but it could also be different. Next select the Search menu option and choose Replace or press Ctrl-H on your keyboard.
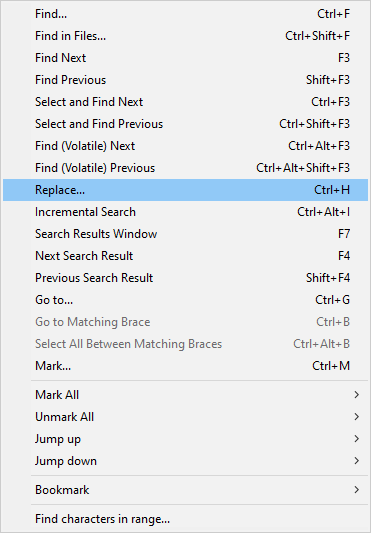
This will bring up a screen like the one below. Type in the IP that came after openvpn@ (might be 10.0.0.4) in the first text box and the IP of your VM in the second text box (the one you wrote down earlier) and press Replace All.
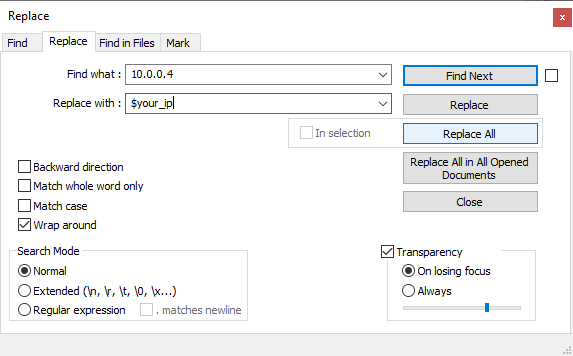
Now all the instances of the old IP are replaced with the new IP. If we hadn't done this step you wouldn't have been able to connect to the VPN server after importing the configuration file.
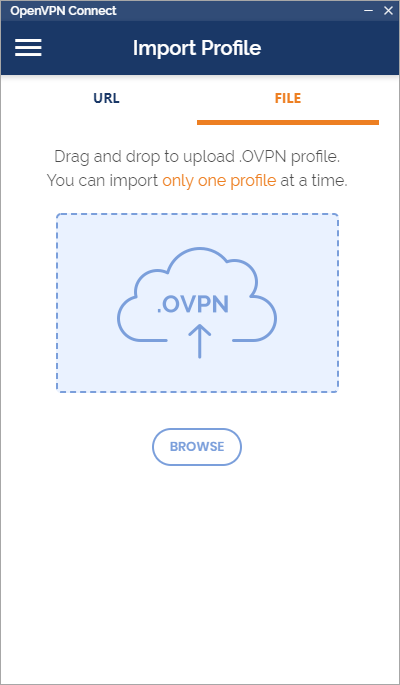
Next you'll want to open the OpenVPN Connect application and choose the File option. Drag and drop the configuration file you just edited onto the indicated area. This will import your configuration.
On the next screen make sure that the Access Server Hostname field matches the public IP address of the VM you created. If it doesn't then you'll need to go back and edit the configuration file again to make sure it's there.
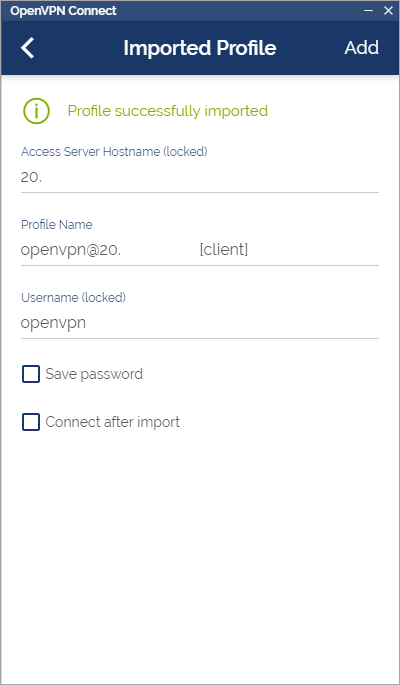
If you want you can check the Save password and Connect after import options and then click the Add button. With that you're good to go! Now you can connect to the VPN server at the click of a button (and the typing of a password).
Happy gaming!